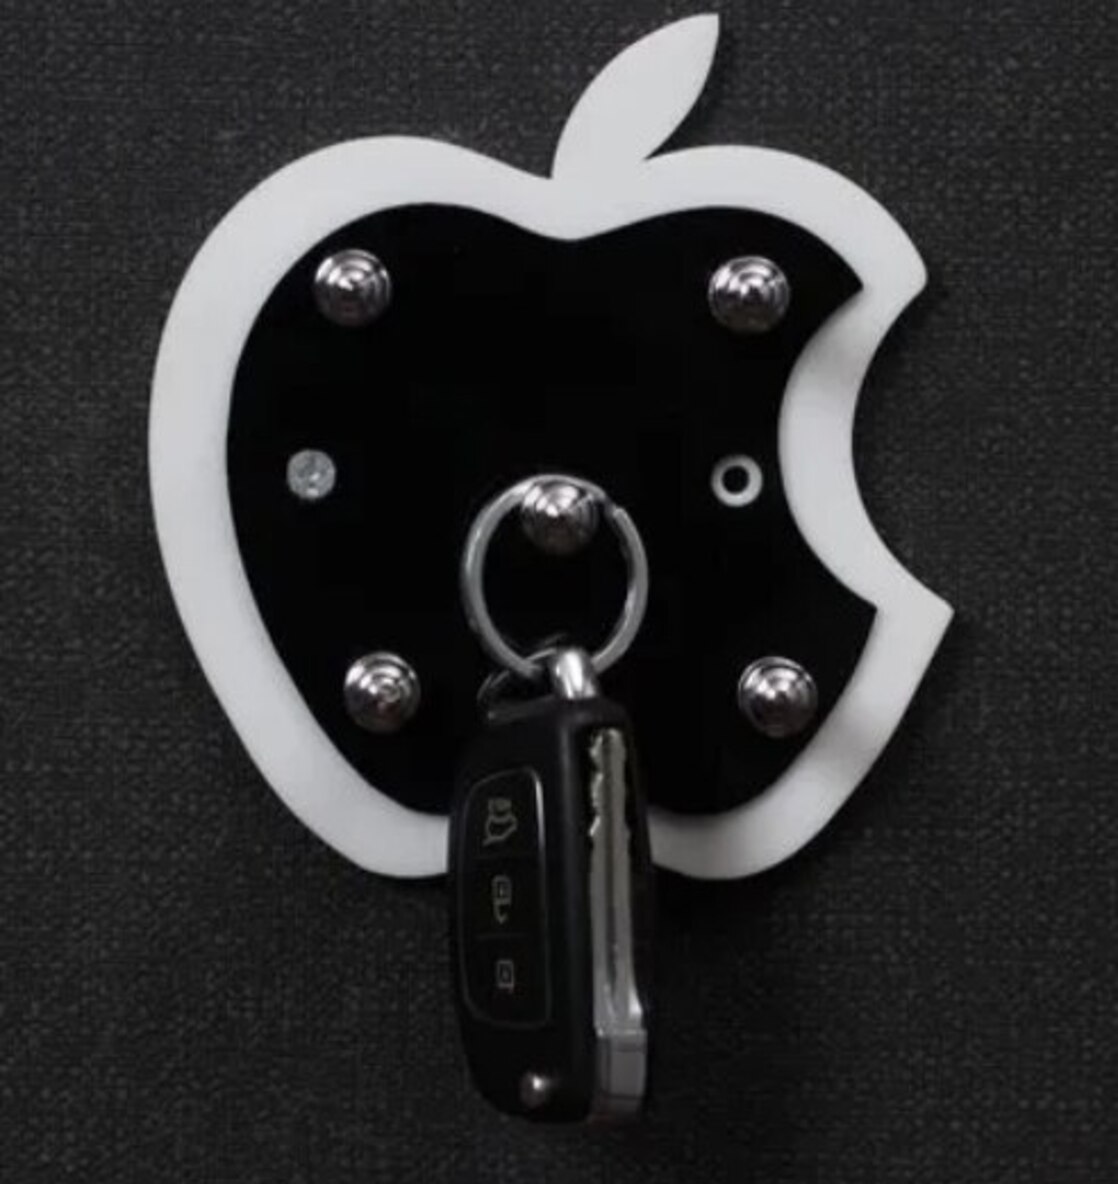
Keys become difficult to manage when house keys, car fobs, access cards, and spare rings share one shallow stand. You will be able to assign each item a practical place, check whether an apple-shaped acrylic stand fits your entrance, choose a safe mounting method, and prevent crowding, scratches, and repeated impact.
Key takeaways
- Place the stand within one arm’s reach of the entrance.
- Separate household, vehicle, office, and spare keys before adding more.
- Check the stand’s footprint, base stability, and usable hook capacity.
- Match adhesive, screws, or shelf placement to the entrance surface.
Build a return-home routine around the stand
Place the acrylic apple key stand within one arm’s reach of the entrance, on a stable shelf or console that does not block the door, lock, or walking path.
Keep it in the same visible position every day, with enough clearance to lift a key ring without striking the stand against a wall or nearby object.
Assign each household member one marked hook, slot, or compartment so nobody creates a shared pile.
- On entering, each person goes to the stand before putting down bags, shoes, or parcels.
- Return everyday house keys to the assigned position immediately; do not leave them in a pocket or on the nearest surface.
- Keep car keys in the same position when they are used daily, or assign a separate position if their fob makes the bundle bulky.
- Place access cards flat in a dedicated compartment if the stand has one; do not wedge them behind hanging rings where they can fall out.
- Check that the key ring is fully seated before walking away, especially if the slot is narrow.
Use a simple visual rule: empty hands after entry mean keys have been returned. For children or guests, reserve one clearly identified position rather than allowing temporary placement on the console.
If the stand rocks, slides, or forces several bundles into one opening, move it to a better-supported location or reduce what the entryway key routine asks it to hold.
Separate key types before the stand becomes crowded
Everyday house keys, one car key, an access card, and a small key ring fit comfortably when each hook or slot serves one person or purpose. Crowding starts when several keys share one ring, especially with bulky key fobs or remote controls.
Key bundle size matters more than the number stamped on the product. A bundle that hangs close to the stand puts less leverage on a hook than the same bundle swinging several centimetres outward, so keep heavy sets on the lowest, strongest position.
| Item | Usually fits | Give it a separate location when |
|---|---|---|
| House keys | One small ring per hook | Several household sets share one hook |
| Car keys | One compact fob and key ring | The fob is bulky, heavy, or swings into the acrylic |
| Access cards | One card in a slot or slim sleeve | The card must stay flat, visible, or protected from bending |
| Remote controls | A small remote in a deep tray | The remote is long, thick, or needed beside the vehicle |
| Spare keys | One labelled spare on an unused hook | You keep multiple spares for guests, tenants, or emergencies |
Do not hang spare keys on the daily hook: they add weight and make the correct ring harder to identify. Store them in a labelled drawer or locked cabinet instead. Put remote controls in a shallow entrance tray, and give bulky key fobs a separate hook or bowl when they obstruct neighbouring keys.
A crowded stand invites you to drop keys on the surface rather than return them to a hook. Set a personal limit before buying: one everyday bundle per position, with no overlapping fobs.
Check dimensions, stability, and usable capacity
Measure the stand’s overall width, height, depth, footprint, hook spacing, and wall clearance against the space beside your entrance. Then compare its stated load limit with your heaviest complete key bundle, not the weight of one loose key.
Before buying, check:
- Overall dimensions: leave enough depth for keys to hang without striking the wall, door, trim, or nearby furniture.
- Hook spacing: allow each bundle to hang separately; tightly packed hooks make removal awkward and transfer knocks between keys.
- Base dimensions and mass: an apple silhouette can have less effective width than a rectangle, so favour a wide, weighted, or non-slip base over decorative thickness.
- Base stability: place the heaviest bundle at the farthest usable hook or edge, then check whether the stand rocks, slides, or tips.
- Load information: ask for the maximum load, test orientation, distance from the base, and failure criterion. A static centre load does not represent repeated key drops.
- Usable depth: include bulky car fobs, access-card holders, and protective cases when checking clearance.
- Wall clearance: for a freestanding stand, measure the gap behind it; for a wall-mounted model, confirm that hanging keys will not hit the wall.
Acrylic can chip or crack when a heavy bundle strikes a thin apple-shaped profile. During inspection, look for edge chips, burrs, crazing around holes, and loose or poorly bonded pads; a representative loaded test reveals more than dimensions alone.
Match the mounting method to the entrance surface
Match the attachment to the surface: use screws where the wall can hold them, adhesive mounting only on smooth, clean surfaces, and a freestanding key stand when fixing would be unreliable. A frequently used entrance exposes tape to outward pulls, which create peel forces rather than simple shear.
| Surface | Recommended installation | Avoid |
|---|---|---|
| Painted drywall | Fix a wall-mounted key stand to a stud, or use a rated hollow-wall anchor through its mounting plate. | Do not trust tape on dusty paint or an unprepared surface. |
| Tile | Drill with a tile-rated bit, keep holes away from edges, and anchor into the backing where possible. | Do not hammer through tile; cracking can spread from the hole. |
| Glass | Use a freestanding key stand, or adhesive rated specifically for clean glass and the stand’s load. | Never drill tempered glass on site. |
| Wood | Drive screws into solid wood or a suitable cabinet panel; pre-drill near edges. | Do not overtighten, which can split thin boards. |
| Laminate | Screw through the laminate into the substrate, or place the stand on a protected shelf. | Do not assume the decorative laminate layer can hold a load. |
| Textured walls | Choose a freestanding key stand or mechanical fixing with spacers that bridge the uneven surface. | Do not apply tape over peaks, dust, or loose paint. |
For adhesive mounting, clean with the tape maker’s specified solvent, let the surface dry, and press for the stated time before loading. Non-slip pads help a freestanding stand, but confirm the pad material is compatible with painted surfaces, porous wood, and laminate to prevent residue or discoloration.
Protect the acrylic during daily use and buying checks
Use non-slip pads under the base to reduce sliding, rattling, and noise on a hard console. Leave a small wall clearance behind a freestanding stand, and add soft bumpers if keys could swing into the wall.
Choose rounded slots and smooth, polished edges; a sharp slot can abrade key rings and start a crack at a stressed point.
Inspect each incoming stand against a written check, not only its dimensions:
- Reject edge chips, burrs, cloudy edge haze, deep protective-film removal marks, and crazing around holes or slots.
- Set it on a flat surface and press each corner; base rocking indicates poor stability.
- Peel the film carefully and check for bubbles, inclusions, haze, or scratches beneath it.
- Confirm that the non-slip pads adhere fully and sit level.
- Load the heaviest intended key bundle at the farthest usable slot, then check for tipping and wall contact.
- If a stainless hook or plate is fixed to PMMA acrylic, look for clearance, compliant washers, or slotted holes; rigid clamping can crack the acrylic as temperatures change.
HV Enterprise can use this acceptance checklist when discussing a custom or adjacent organizer, rather than relying on a generic “clear acrylic” description. ASTM D256 impact data describes sheet or resin performance, not the finished stand’s stability.
Clean with water, a soft microfiber cloth, and mild detergent cleaning. Avoid abrasive powder, rough paper towels, dry wiping, acetone, ketones, aromatic solvents, and solvent-based adhesive; scratches and stress crazing are difficult to reverse.
Frequently asked questions
Where should you place an acrylic apple key stand?
Place it within one arm’s reach of the entrance on a stable shelf or console that does not obstruct the door, lock, or walking path.
How do you stop the key stand from becoming overcrowded?
Separate household, vehicle, office, and spare keys, then remove outdated keys and duplicates before adding new ones.
What should you check before buying an acrylic apple key stand?
Measure the available shelf or wall space, check the base or mounting stability, and compare usable capacity with the number of key sets you carry.
How should you protect the acrylic stand during daily use?
Keep it away from impact points, clean it with a soft cloth and mild soap solution, and avoid abrasive pads or harsh solvents.