A phone left loose on a desk, kitchen counter, bedside table, or reception surface is easy to overlook, knock over, or cover with other items. By matching the stand to your phone case, viewing position, charging cable, and available surface, you can create a dependable place where the phone stays visible and accessible.
Key takeaways
- Choose one visible, reachable location for your phone.
- Keep the screen upright for calls, viewing, and notifications.
- Check the stand width, base, and phone-case clearance before use.
- Route the charging cable without bending or pulling the connector.
Why a Fixed Phone Position Makes Everyday Tasks Easier
A fixed phone position turns an easily misplaced handset into a device you can see and reach without searching. An acrylic mobile stand creates one designated location on a desk, counter, bedside table, or reception surface, so the phone stops disappearing under papers, behind a laptop, or inside a bag.
That consistency improves phone organisation because you know where to return the device after every call or task. A stable phone holder also keeps the screen raised and angled toward you, making notifications, the time, and incoming calls visible without picking up the phone.
The exact angle should match your seated eye level and viewing distance; a flat resting surface does not provide the same benefit.
A fixed position is useful for everyday tasks such as:
- Following a recipe while cooking without touching the phone repeatedly
- Joining a video call while keeping both hands available
- Checking notifications during desk work
- Using the phone as a visible clock
- Charging the phone upright instead of leaving it flat
Choose visible phone storage that fits the available counter depth. Compare the assembled footprint, including the base and rear support, rather than judging the acrylic panel alone. If the stand extends too far, its convenience disappears; if the phone overhangs the base, tapping the screen or pulling a charging cable can shift it.
An acrylic stand positions the phone, not cools it, so charging still depends on airflow, the case, and the charger.
Place the Phone Correctly for Calls, Viewing, and Notifications
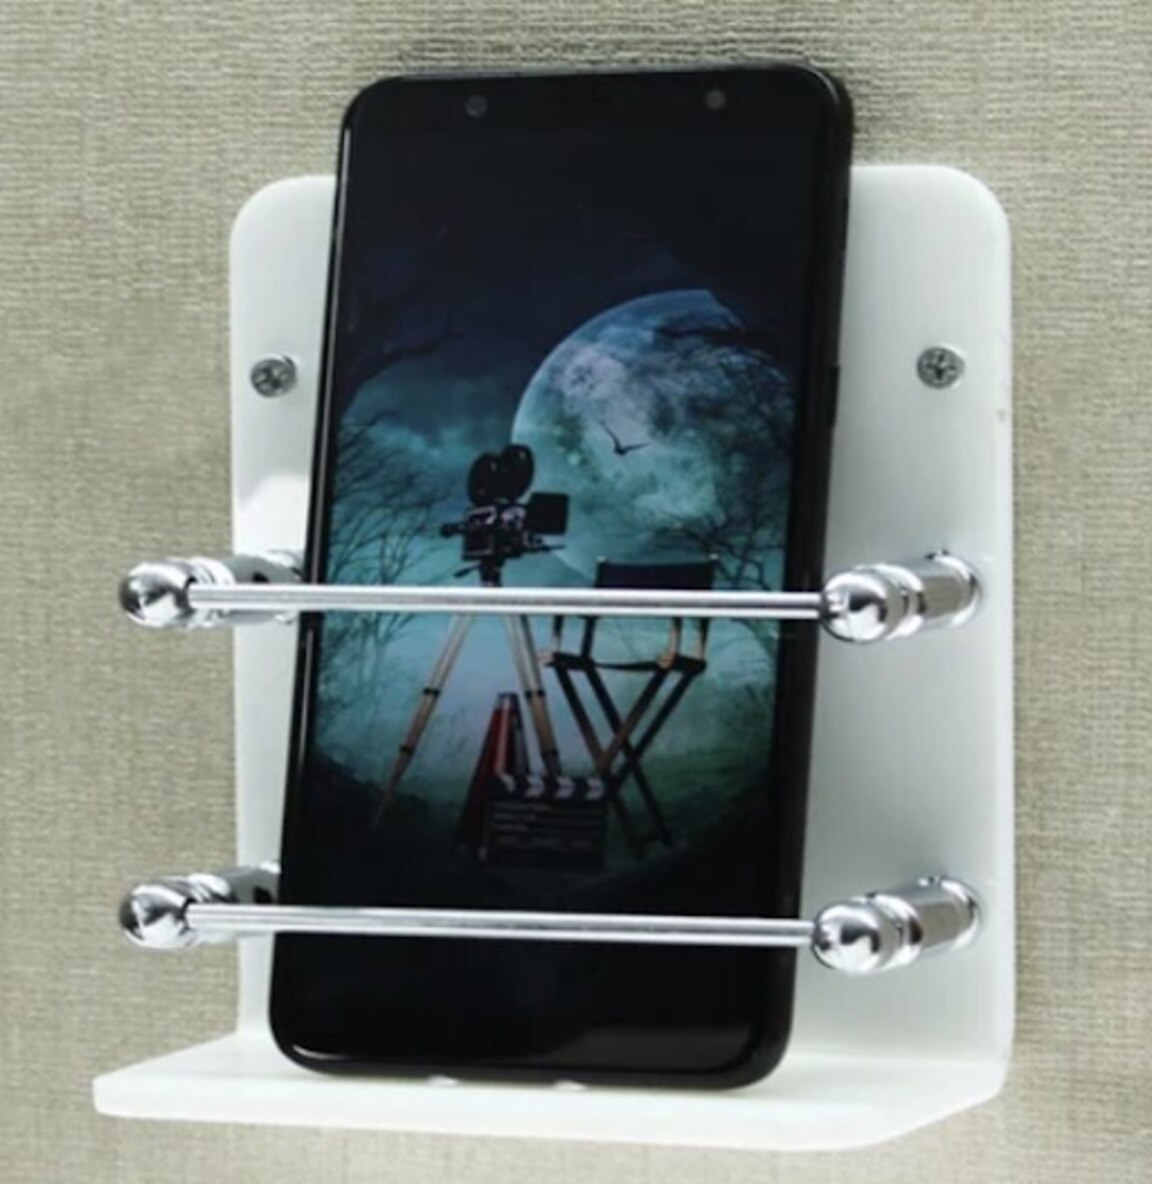
Seat the phone with its bottom edge resting behind the stand’s front retaining lip, while the rear support carries the handset. In portrait mode, keep the screen upright for calls, notifications, and clock use; rotate it into landscape mode for wider video content or video calls.
Use this placement check:
- Centre the phone so its weight sits over the base, not beyond the front or side edges.
- Keep the screen facing you at a viewing angle of roughly 60–75 degrees for seated desk use.
- Confirm that the lip holds the phone without covering essential display content or pressing against the screen protector.
The front lip is a working part of the stand, not decoration. A height of about 8–15 mm usually retains a phone in either orientation, while a radiused or polished inner corner reduces pressure on the glass and case.
Check phone case compatibility before inserting the device. A rugged case adds several millimetres to the phone’s width and thickness, while a folio case can create extra bulk at the rear or hinge.
Do not force a cased phone into a narrow slot; specify the stand’s maximum supported width and thickness instead of relying on phone-model names.
Keep the case fully seated against the support. If it leaves the phone tilted forward, hides the charging port, or makes the handset overhang the base, use a wider stand or remove the case before placing it.
Check Fit and Stability Before the Phone Goes on the Stand
A secure stand needs more than a thick acrylic panel. Check the assembled base footprint, base thickness, contact grip, and the phone’s centre of gravity; a rigid stand can still tip when you tap the top of the screen or pull the charging cable.
| Feature | What to measure | What failure it prevents |
|---|---|---|
| Slot width | Allow the phone and fitted case to enter without force, while preventing side-to-side movement | A loose phone sliding or leaning |
| Slot depth | Support enough of the lower edge to keep the phone seated, without hiding buttons or the charging port | The handset lifting out or rocking |
| Front lip | About 8–15 mm high, with a polished or rounded inner corner | Forward sliding and pressure on the screen protector |
| Base footprint | Compare the complete front-to-back and side-to-side dimensions with your available surface | A stand that consumes excess counter depth |
| Feet and base | Use grippy feet and a thick, level base | Sliding or forward rotation during tapping |
Measure the maximum phone width and thickness with its case fitted, not just the bare handset. Rugged and folio cases can add several millimetres, and a phone that overhangs the base shifts its centre of gravity beyond the support area.
Test both portrait and landscape positions before regular use. The rear support must hold the device without forcing it backward, while the base must remain planted when you insert a cable, remove the phone, or tug the cable sideways.
Use the Stand as a Charging Position Without Straining the Cable
A charging position works only when the cable reaches the phone without lifting, twisting, or pressing against the stand. Look for a cable pass-through aligned with the charging port in both portrait and landscape positions.
A rear slot or open lower edge lets the plug exit freely; a narrow enclosed channel can trap the connector and collect dust.
Size the charging cut-out for the connector and cable, not merely for the phone body. A 12–18 mm opening accommodates many USB-C and Lightning plugs, but a right-angle connector or thick braided charging cable needs more clearance.
The edge should leave a gentle cable bend, because a sharp bend can loosen the plug, damage the cable, or pull the phone towards the stand’s front edge.
Acrylic keeps the phone positioned but does not act as a heat sink: PMMA transfers heat poorly compared with metal. Keep the phone’s charging area ventilated, and avoid treating the stand as a substitute for a suitable charger or airflow.
For cleaning acrylic, use a soft lint-free cloth with mild soapy water, then dry it; ammonia, solvent cleaners, abrasive powders, and rough sponges can cloud or scratch the surface. Rounded edges and an open underside make wiping easier, while clear acrylic reveals dust and fingerprints that need regular removal.
Specify the Details That Matter for Shared or Frequently Cleaned Spaces
Ask the supplier to confirm that the commercial phone stand is designed for repeated handling, wipe-downs, and limited counter space—not only occasional home use. Request a sample and test it on the actual surface, with the phone case and charging cable fitted.
- Specify PMMA acrylic grade, sheet thickness, and compatibility with the cleaning product used at your site. Ask for a written warning about solvents or disinfectants that can cloud, craze, or weaken the material.
- Confirm the assembled footprint, including the rear support and cable route. A stand that overhangs the counter or occupies excess depth becomes a collision point at a busy reception or retail desk.
- Ask how the edge finish is produced and whether the supplier controls taper, heat-affected marks, and local stress. A polished-looking edge can still show manufacturing variation.
- Request rounded corners and an open underside so staff can wipe beneath and around the stand without leaving dirt in a closed cavity.
- Confirm that the non-slip feet are replaceable, securely retained, and compatible with the counter material. Adhesive pads that cannot be removed turn into grime traps.
- Ask for cleaning and inspection instructions, including how to handle scratches, whitening, or a cracked panel before it reaches a customer-facing counter.
HV Enterprise can be asked to quote against this checklist, so you compare the finished accessory rather than judging clear acrylic by appearance alone.
Transparent PMMA acrylic keeps the phone and cable visible, but it also reveals fingerprints, dust, and edge scratches. Choose frosted or opaque material when a constantly pristine appearance matters more than seeing through the stand.
Frequently asked questions
Why does a fixed phone position make everyday tasks easier?
It gives your phone one visible, reachable location, reducing time spent searching under papers, behind laptops, or inside bags.
How should you place a phone on an acrylic stand?
Set the phone upright with its screen facing you, then position it for clear calls, comfortable viewing, and visible notifications.
What should you check before placing a phone on the stand?
Check that the phone and case fit the stand, the base stays stable, and the device does not slide or tip when tapped.
Can an acrylic mobile stand be used while charging?
Yes. Place the phone where the connector reaches without bending, twisting, or pulling the charging cable.
Which stand details matter in shared or frequently cleaned spaces?
Choose a smooth, accessible design that is easy to wipe, remains stable on the surface, and supports the phone without loose parts.