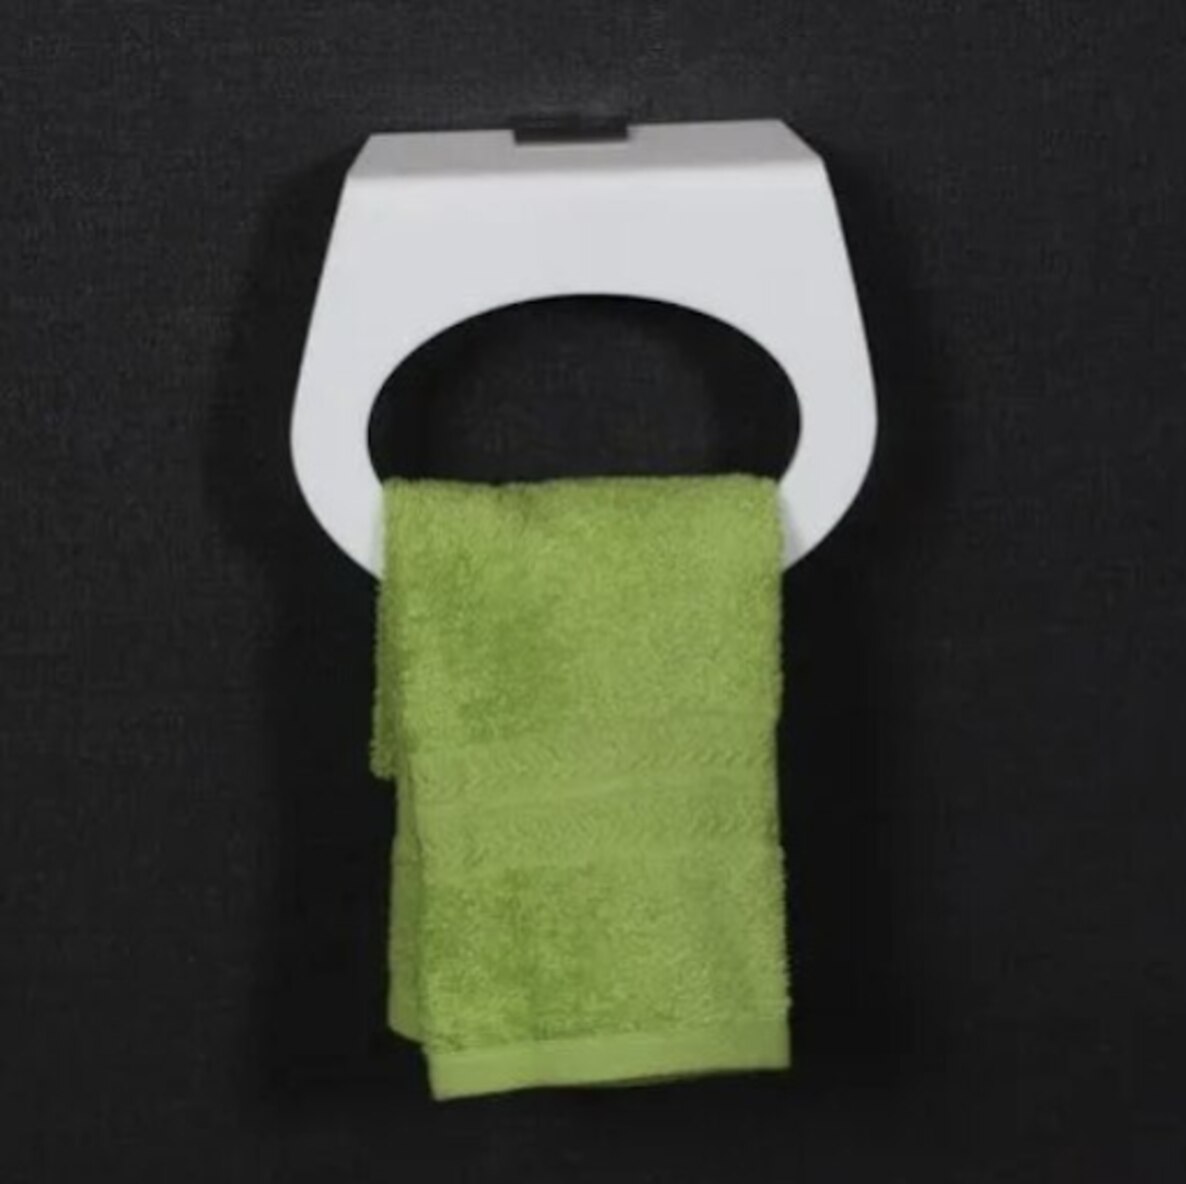
The best towel-ring position is close to the washbasin, within one-handed reach, and clear of moving doors, drawers, faucets, and splash zones. By the end, you will be able to choose the right wall or vanity surface, set a usable height, check clearances, and select a fixing method that suits your bathroom and its users.
Key takeaways
- Install the ring beside the lavatory, outside doors, drawers, and faucet clearance.
- Set the ring at a comfortable reach for the primary bathroom users.
- Leave space for the towel to hang without touching walls or fixtures.
- Fix the ring to solid backing and protect it from impacts and standing water.
Which bathroom location makes a towel ring easiest to use?
The wall beside the lavatory is usually the easiest place to install a towel ring: you can release a wet hand and reach sideways without turning or stepping away from the basin. The best acrylic towel ring location is close to the sink but outside the mirror, faucet, door, and drawer operating envelopes.
| Option | Advantage | Check before choosing |
|---|---|---|
| Adjacent wall beside basin | Fast lateral reach | Keep clear of the vanity edge, backsplash, toilet, and circulation path |
| Vanity side panel | Compact and convenient | Confirm the panel is strong, drawers open fully, and the towel will not touch the basin |
| Wall near shower or bathtub | Useful after bathing | Keep the towel outside shower spray and away from wet glass |
| Near entrance or toilet | Usually inconvenient | Avoid door casing, narrow paths, toilet contact, and accidental snagging |
For everyday bathroom towel ring placement, compare the side panel with the adjacent wall by opening every drawer and cabinet door. Choose the surface that leaves the towel hanging beside, not over, the basin and keeps the ring out of the bathroom entrance.
A second ring near the shower earns its space when the basin is far from the bathing area or several people share the bathroom. Do not place the only ring inside the spray zone, beside the toilet, or where a full-size towel blocks movement.
Before drilling, swing the ring through its full travel. It must not strike the mirror, backsplash, shower screen, door casing, wall cabinet, or faucet. Also check that the hanging towel will not enter a narrow circulation path.
What height and reach should you use for different bathroom users?
Set the centre of the towel ring about 48–52 inches (122–132 cm) above the finished floor for ordinary residential use. Measure from the completed floor, not the vanity top, because vanity heights vary and can distort the towel ring mounting height.
1. Use 48–52 inches as the adult reference, then check the actual user’s elbow and hand reach. Keep the ring low enough for a shorter adult or person with limited mobility to grasp without stretching, twisting, or leaning across the basin.
2. For children, mount a separate ring lower—often around 30–40 inches—rather than lowering the adult ring so far that a hanging towel strikes the basin, faucet, or vanity drawers. Test the child’s reach and leave room for the towel’s full 20–30-inch drop.
3. For a wheelchair user, keep the ring within an unobstructed seated reach and place it where the chair can approach without the vanity blocking the hand. In a covered commercial installation, an accessible bathroom towel ring must fit the ADA unobstructed forward and side reach range of 15–48 inches above the floor.
That ADA towel ring height range is an accessibility limit, not a universal residential rule.
4. Check projection in circulation paths. Under ADA path-of-travel requirements, a wall-mounted object with a leading edge between 27 and 80 inches high may project no more than 4 inches into the path.
Never use a towel ring for body support. It is not a grab bar; pulling on it can tear out the fixing and cause a fall.
How much space should remain around the ring and hanging towel?
Leave enough space for the ring and a towel that drops 20–30 inches below it. Towel ring clearance must include the basin rim, countertop, faucet controls, backsplash, toilet, floor, wall corner, vanity drawers, and bathroom towel splash zone—not just the empty ring.
1. Position the towel ring near sink access, but outside the faucet and basin operating area. Keep the towel from brushing a wet basin, toilet, countertop edge, or floor, where it will stay damp and collect contamination.
2. Swing the ring through its full travel before drilling. Check that it cannot strike the backsplash, mirror, wall cabinet, shower screen, door casing, faucet, or wall corner.
3. Open every vanity drawer and cabinet door, then check mirror access and nearby electrical outlets. Reject any position where the towel covers a door, blocks a drawer, reaches an outlet, or catches on a projecting edge.
4. Hold the actual full-size hand towel at the proposed hand towel hanging height, or hang it temporarily. Operate the faucet, flush the toilet, and walk past the installation; confirm the towel stays outside the shower spray and does not create a trip or snag hazard.
A towel that clears the ring can still foul a fixture once wet and fully extended. Check the towel’s lowest point, not merely the mounting hardware.
Which wall or panel can safely carry an acrylic towel ring?
For acrylic towel ring installation, inspect the fixing surface before choosing hardware. Locate studs or blocking, and scan for pipes, concealed plumbing, and electrical wiring. On drywall, use a drywall anchor for towel ring rated for the wall thickness and load; on masonry, use a masonry plug and screw.
Avoid grout joints, tile edges, hollow sections, and weak vanity side panels.
Choose the method against the surface and expected use:
| Option | Suitable surface | Main condition |
|---|---|---|
| Screw fixing | Studs, blocking, masonry, tile over solid backing, or sound vanity panels | Use the correct anchor; drill tile with a tile- or masonry-rated bit and low pressure |
| Adhesive mounting | Clean, smooth, dry, non-porous tile, glass, or sealed panel | Textured tile, porous paint, wallpaper, grout, silicone, soap film, and condensation reduce adhesion |
| Suction mounting | Smooth, non-porous glass or tile | Check the seal regularly and remove the ring if it starts lifting |
| Pre-existing accessory rail | A rail designed and rated for bathroom accessories | Confirm the rail’s load rating and secure attachment to the wall |
For tile wall towel ring fixing, keep the hole away from edges and grout, size the pilot hole to the anchor, and tighten without crushing the tile or acrylic. Adhesive towel ring curing time means the manufacturer’s full stated period; do not load a wet towel before it ends.
High-use commercial washrooms need rated mechanical fixing or a properly designed accessory rail.
Before specifying a product from HV Enterprise, request the substrate instructions, maximum towel load, compatible anchors, curing time, and acrylic tightening guidance.
How should you protect the ring and its fixing during everyday bathroom use?
Over-tightening is the quickest way to turn a secure acrylic towel ring into a cracked one. Use broad, flat bearing surfaces, avoid point loading, and tighten screws only to the product guidance or specified hand-tight setting; an impact or compressed mounting plate can cause stress cracking.
- Drill tile with a tile- or masonry-rated bit, low pressure, and a correctly sized pilot hole. Keep the hole away from tile edges and grout joints, fit an anchor rated for the substrate, and tighten the screw in a controlled manner.
- Match the fastener to the wall: use a stud or blocking where available, or an anchor rated for drywall, masonry, or the complete tile assembly. A decorative cap hides a screw, but it does not increase an anchor’s load capacity.
- Treat the ring as a towel holder, not a grab bar. Check the towel ring load limit and never let anyone pull on it or use it to support body weight.
- For acrylic bathroom accessory care, use a soft cloth and an approved mild cleaner. The correct answer to how to clean acrylic towel ring is never abrasive powder, a scouring pad, or a solvent cleaner, which can scratch, haze, or craze the surface.
- Wipe stainless steel dry after removing salt, bleach, acidic cleaner, and trapped moisture. Make the 304 versus 316 stainless steel bathroom choice according to exposure: Type 316 resists chloride exposure better, while neither grade tolerates deposits left on the surface.
Hang the first wet towel, then recheck the fixing, wall contact, ring movement, and cracks. Repeat that inspection after several uses; looseness or whitening around a screw calls for unloading and refitting.
Frequently asked questions
Where is the most convenient place to install an acrylic towel ring?
Install it on the wall beside the lavatory, where you can reach it sideways without leaving the basin. Keep it outside the mirror, faucet, door, and drawer operating areas.
What height should an acrylic towel ring be installed at?
Choose a height that lets the primary users reach the ring without bending or stretching. Check the position with the towel hanging before drilling, and use a lower installation for children or wheelchair users.
How much clearance does a towel ring need?
Leave enough room for the ring to rotate or flex as designed and for the towel to hang without touching the faucet, countertop, wall, floor, or nearby hardware. Check drawer and door movement at full opening.
Which surfaces can support an acrylic towel ring?
Use solid masonry, timber, or a wall area backed by a stud or suitable reinforcement. On drywall or a hollow panel, select an anchor rated for the wall material and the expected load.
How can you protect an acrylic towel ring during daily bathroom use?
Keep it away from impact points, direct shower spray, and hot appliances. Tighten fixings without over-compressing the acrylic, wipe away standing water, and avoid abrasive cleaners.